 |
RPGlite Starter Kit
1.0.0
Starting RPG projects made easy.
|
|
RPGlite Starter Kit
1.0.0
Starting RPG projects made easy.
|
To start using RPGlite, I recommend first testing the RPGliteDemo scene inside the RPGliteStarterKit folder, and checking it for reference.
For implementing the systems in your own scenes, you can follow the next steps.
From the RPGliteStarterKit/Prefabs folder, drag the InventoryManager prefab and drop it in the scene hierarchy.
You can customize all of its attributes in the inspector, with the InventoryManager instance selected.

Details on each of the attributes:
To add them to your scene, the simplest way is to drag the Canvas prefab from the Prefabs folder an drop it into the hierarchy. It already contains the pre-configured inventory and shop systems.
If you want to add them individually to your own scenes, drag an drop the Inventory and Shop prefabs into the Canvas in your scene.
⚠️ Tip: If you cannot click the items in the UI or otherwise interact with the inventories, make sure you have a Unity EventSystem in your scene hierarchy.
To choose which items will be presented in the inventory, first select the Inventory in the scene Hierarchy. In the inspector, find the Inventory script component, expand the itemIds list and add or remove the corresponding numerical IDs that you want.
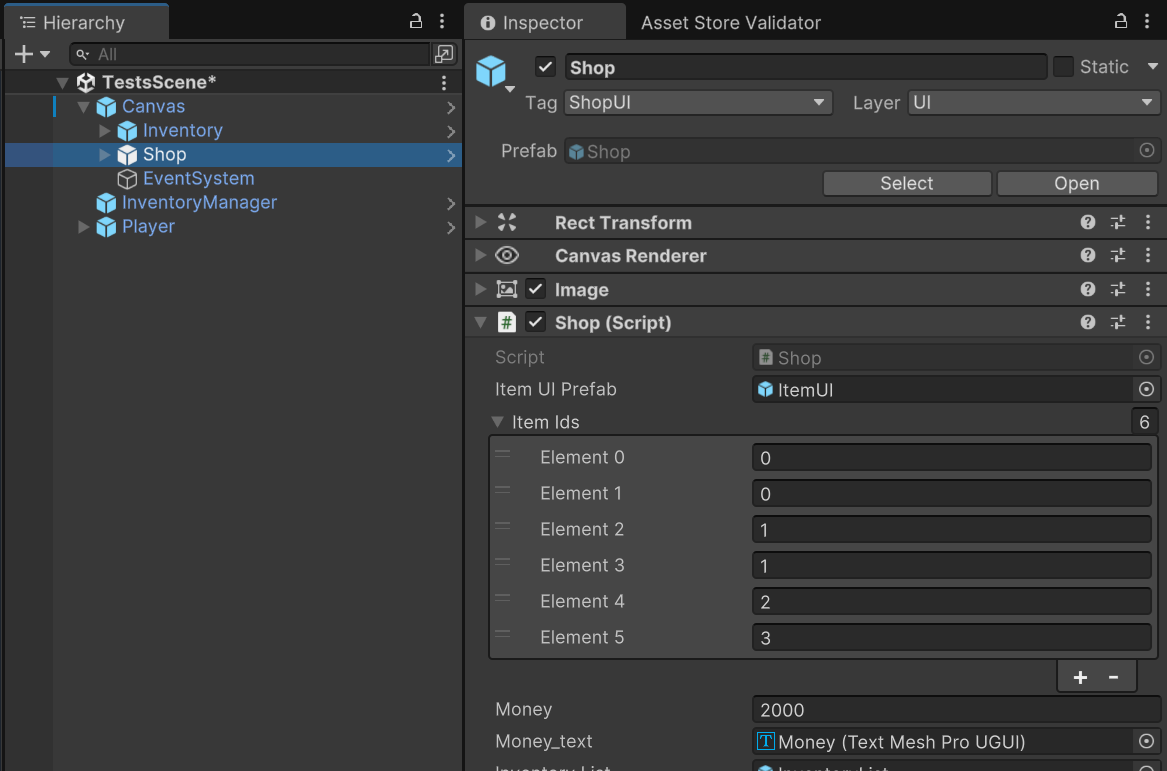
The process is identical for the shop. Select the Shop in the scene Hierarchy, and find its Shop script component in the inspector. Modify the itemIds list in the same manner as you did with the Inventory.